Introduction
In the world of small business and freelancing, one of the most critical yet often overlooked tasks is creating professional, accurate invoices. The ability to bill clients clearly and promptly directly impacts cash flow, business reputation, and professional relationships. For many entrepreneurs, the idea of investing in expensive, complex invoicing software can feel overwhelming, especially when just starting out.
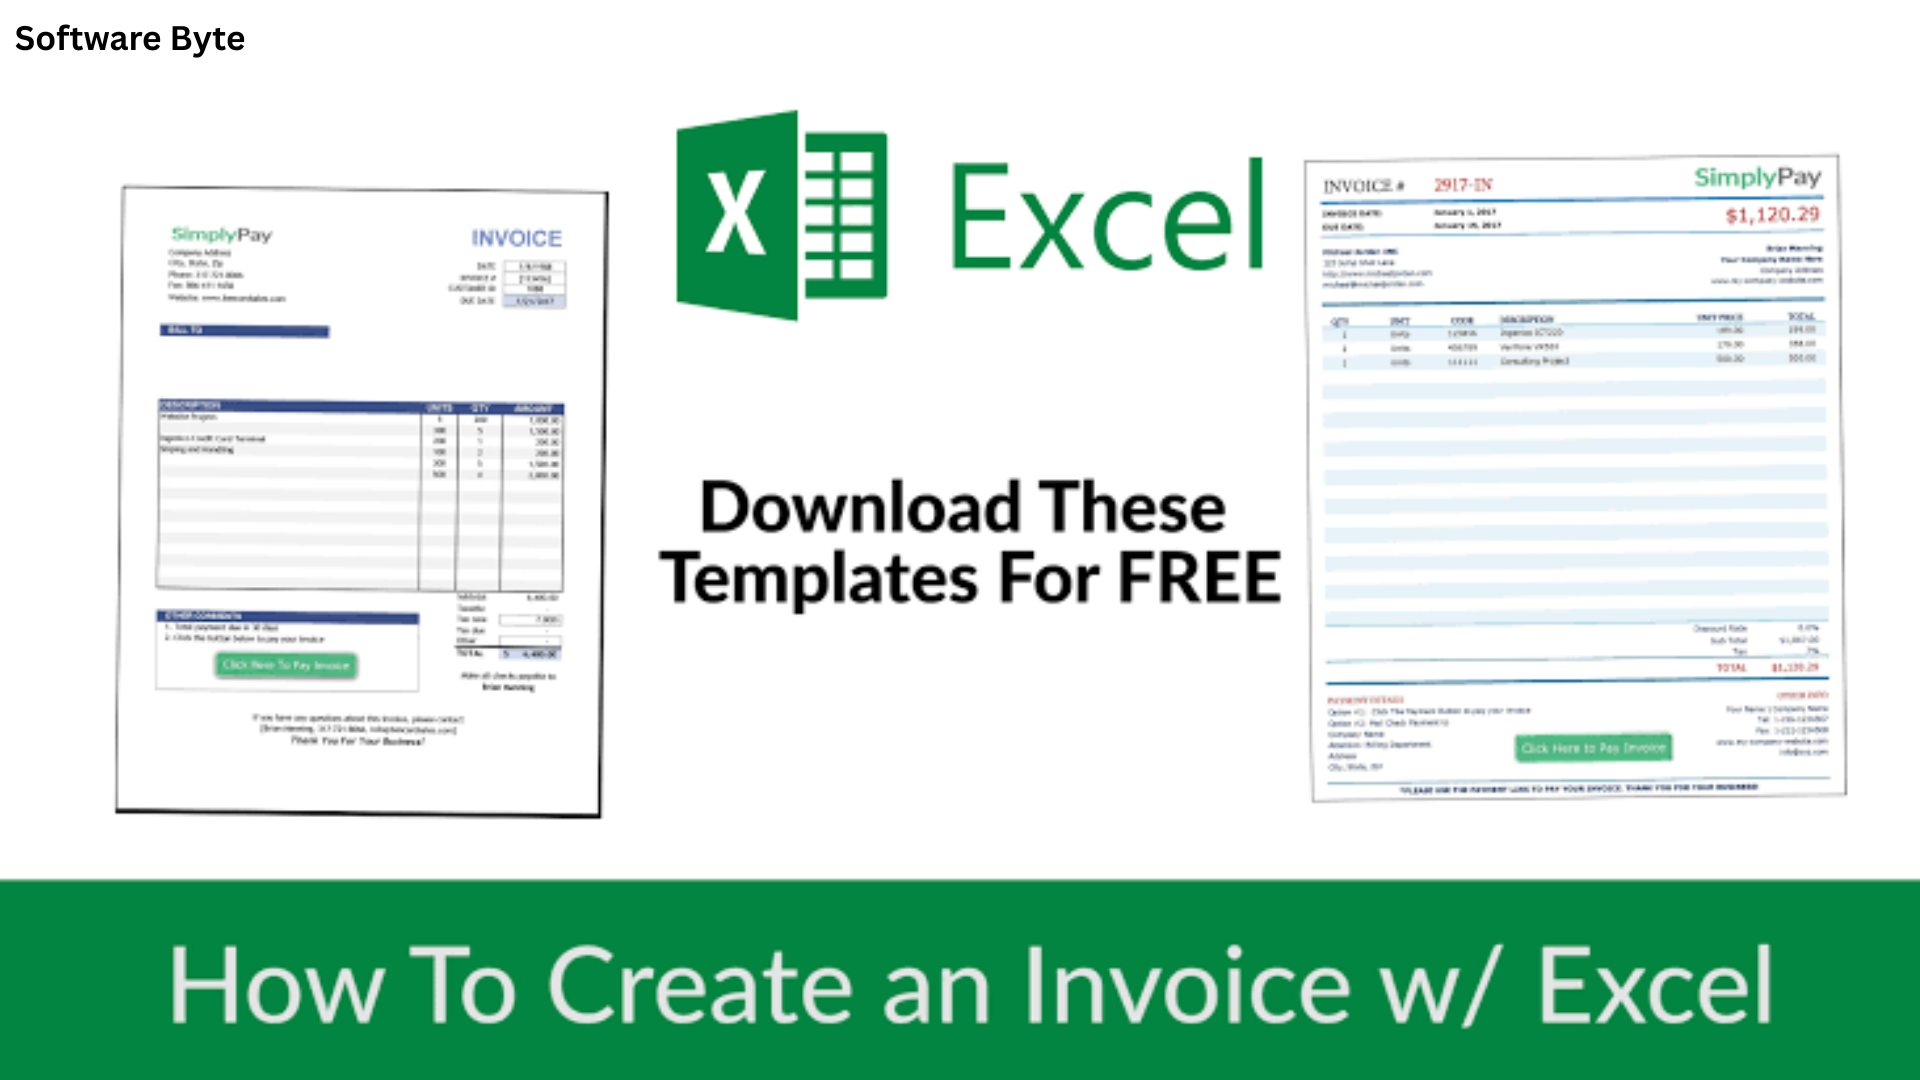
Fortunately, a powerful solution is likely already sitting on your computer: Microsoft Excel. The Excel Invoice Creator represents a practical, cost-effective approach to generating professional invoices without the steep learning curve or ongoing subscription fees of dedicated accounting software. Whether you’re a freelancer billing by the hour, a consultant managing project-based fees, a small retailer, or a growing business handling multiple clients, Excel provides the flexibility to create invoices tailored to your specific needs.
This comprehensive guide explores the world of Excel Invoice Creator tools, templates, and techniques. We’ll examine why Excel remains such a popular choice for invoicing, explore the features that make a great invoice template, and provide step-by-step guidance on finding, customizing, and using Excel to streamline your billing process. By the end, you’ll have a clear understanding of how to leverage this accessible tool to create professional invoices efficiently.
Why Choose Excel for Invoice Creation?
Excel has become a go-to tool for invoice creation for several compelling reasons, making it an attractive option for businesses of all sizes.
Cost-Effectiveness and Accessibility
One of the primary advantages is the cost. For many professionals, Microsoft Excel is already available as part of the Microsoft Office suite or a Microsoft 365 subscription. This means the tool itself is essentially free to use for invoicing, as you’re already paying for the software. For small businesses and freelancers, eliminating the expense of specialized billing software can be a significant benefit, allowing them to allocate resources to other areas of their business.
Furthermore, Excel is widely accessible. The platform is used by millions of people worldwide, which means the learning curve is typically shallow. Users are already familiar with the interface, spreadsheet cells, and basic functions, making it easier to create and customize invoices without extensive training.
Flexibility and Customization
Excel’s power lies in its flexibility. Unlike some dedicated invoicing applications that have rigid structures, Excel offers complete control over the layout, design, formulas, and calculations of your invoice. You can tailor every detail to match your brand’s identity—colors, fonts, logo placement, and the specific information you need to collect.
Automation of Calculations
One of the core strengths of an Excel invoice template is its ability to automate all the mathematical work. Simple formulas can handle calculations for line item totals, subtotals, taxes, and discounts, significantly reducing the chance of human error. This automation ensures your invoices are accurate and professional without manual math, saving time and building client trust.
Offline Functionality and Data Control
Many cloud-based invoicing solutions require a stable internet connection. Excel Invoice Creator tools are typically stored on your local machine, allowing you to work offline without any interruptions. For professionals who work in areas with limited connectivity, this is crucial. Additionally, storing your invoice data locally means you retain full control over your sensitive financial information, which can be a key requirement for businesses with strict data governance policies.
Key Features of an Effective Excel Invoice Creator Tool
A well-designed Excel invoice tool or template should include several key components to be functional, professional, and useful for tracking purposes.
Professional and Clear Layout
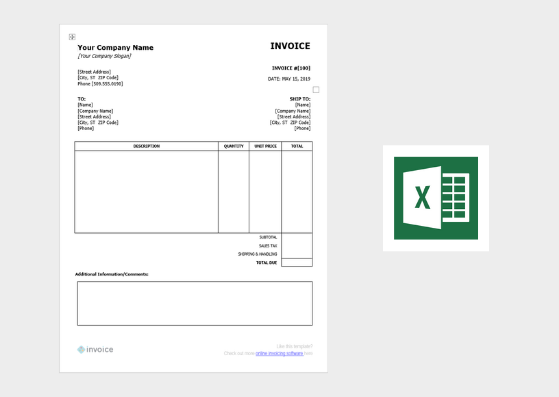
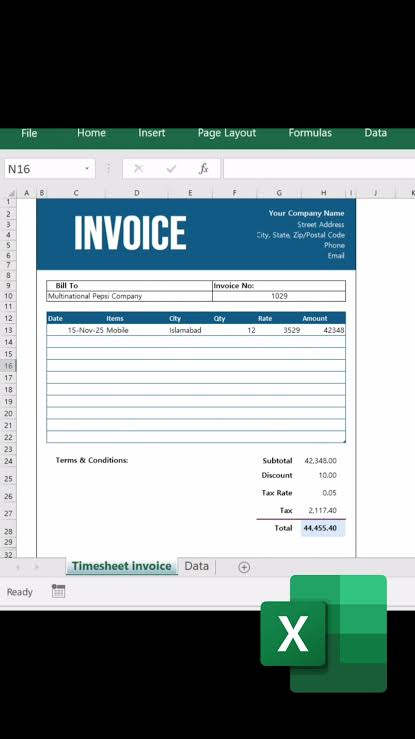
The invoice should be easy to read and clearly present all necessary information. This includes a clean header with your business name and logo, a clear “INVOICE” designation, and an organized body for line items. A professional-looking invoice reinforces your brand and creates a positive impression on clients.
Automated Calculations
The template should automate all key numerical calculations. This involves calculating line totals (Qty * Unit Price), subtotals (SUM of all line totals), tax amounts (based on a specified tax rate), and the final total due. These formulas should be pre-built and protect cells to prevent accidental changes.
Essential Information Sections
A complete invoice must include:
- Invoice Header: Your business name, logo, address, and contact information.
- Client Information: A “Bill To” section for the client’s name, company, and address.
- Invoice Tracking Details: Unique Invoice Number, Invoice Date, and Due Date.
- Itemized List of Goods/Services: Table with description, quantity, unit price, and total for each line item.
- Payment Terms and Instructions: Clear details about payment methods and deadlines.
Data Storage and Management
For businesses needing to manage multiple invoices, tracking capabilities are essential. More advanced Excel solutions often include a separate “Tracker” sheet that records and logs key invoice data such as number, date, amount, client, and payment status. This turns the tool from a simple document creator into a basic bookkeeping system.
Template Variety
Having a choice of different invoice styles is a bonus. Some Excel invoice creators provide multiple templates with different designs, allowing users to choose the layout most suitable for their business type or to use different styles for different clients or purposes.
Exploring the Excel Invoice Template
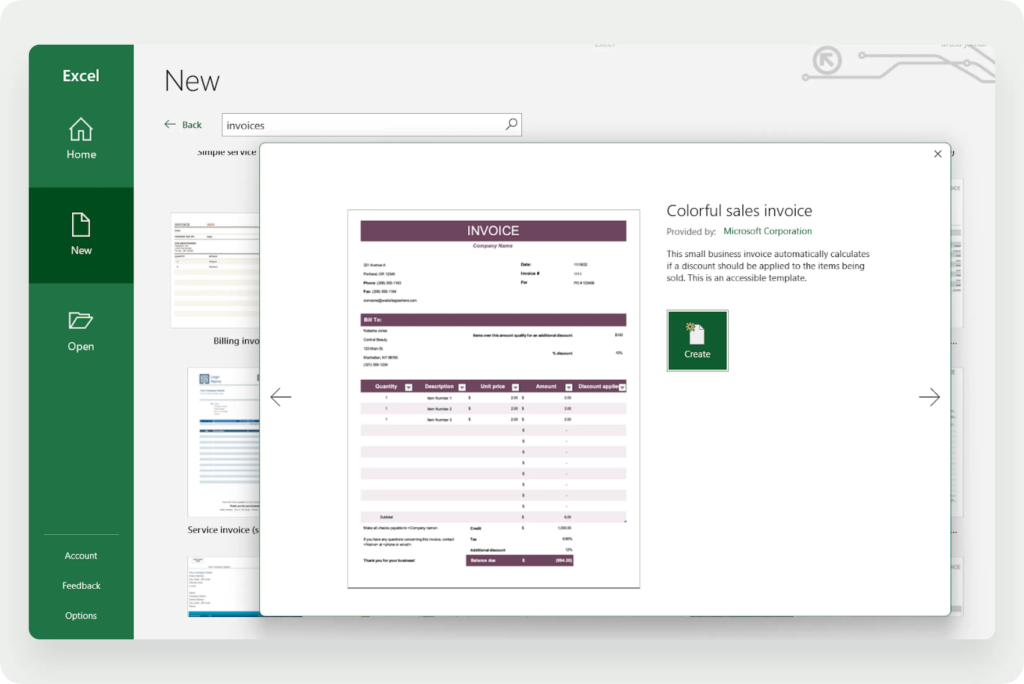
Microsoft Excel has a built-in library of templates that serves as the most straightforward starting point for creating invoices.
How to Access Excel Invoice Templates
Finding and starting an invoice template is a simple process. When you open Excel, you are typically greeted with a startup screen. Here you can find a search bar specifically designed for finding online templates. By typing “invoice” into this bar, a large selection of pre-designed invoice templates will be displayed. You can browse through these options and choose a template that best matches the needs of your business.
Customizing Excel’s Built-in Templates
Once you’ve chosen a template, the next step is to customize it with your business details. This is a straightforward process of “filling in the blanks”. Replace the generic placeholder text with your company name, address, phone number, and email. Add your company logo by clicking on the logo placeholder and inserting your own image file. Some templates also include sample line items which you can replace with your own products or services.
Understanding the Advantages of Templates
The primary advantage of using a template is speed. It allows you to create a professional invoice in minutes without building a document from scratch. Since templates are created by Microsoft, they are designed to work perfectly with Excel’s calculation and formatting features. They provide a solid and reliable foundation for your invoicing needs.
Building an Automated Invoice Template from Scratch
For users who want complete control over the design, structure, and functionality, building a custom automated invoice template is an excellent option. This method requires more upfront time investment but results in a tool perfectly tailored to the specific business.
Step 1: Setting Up the Document
Start with a blank workbook. The first step involves designing the header. This includes adding your company logo (usually in the top left), your company name and address, and clearly labeling the document as “INVOICE”. You can use formatting tools like merging cells, adjusting font sizes, and applying bold or color to make the header stand out. Consider shading the area of the invoice to give it a cleaner, more “document-like” feel, though be mindful if you print the invoice.
Step 2: Adding Invoice Details and Client Information
Next, you need to add sections for all the key information. On the right side of the header, place fields for the Invoice Number, Invoice Date, and Due Date. For the Invoice Date, you can use the formula =TODAY() to automatically populate the current date. For the Due Date, you can use a formula to calculate it. For example, for “Net 30” terms, you can use =DATE_CELL + 30.
On the left side, below the header, create a clear “Bill To” section with fields for the client’s name, company, address, and contact information.
Step 3: Creating the Line Items Table
This is the functional core of the invoice. Create a table with columns for Description, Quantity, Unit Price, Discount (optional), and Price or Line Total. A common practice is to format this as a Table (by selecting the headers and pressing Ctrl + T). Naming the table (e.g., “InvItems”) makes it easier to reference in formulas later.
In the first row of the Price/Line Total column, enter the formula to calculate the total for that line. A typical formula would be:
=ROUND([@Qty]*[@[Unit Price]]*(1-[@Discount]), 2).
Then, drag this formula down to apply it to the entire table column, ensuring it automatically updates as you add new rows.
Step 4: Automating Totals, Tax, and Final Amount
Below the line items table, create a summary section. This will typically include labels for Subtotal, Tax, and Total.
- Subtotal: Use the
SUMformula to add up all the line totals. If your table is named “InvItems” and the price column is “Price,” the formula would look like=SUM(InvItems[Price]). - Tax: If you charge tax, enter your tax rate (e.g., 10%) in a specific cell. Then, calculate the tax amount by multiplying the subtotal by this rate.
=ROUND(Subtotal_Cell * Tax_Rate_Cell,2). - Total: This is the sum of the subtotal and the tax amount. You can also create a named range for this “Total” cell to make it easy to reference elsewhere in the workbook.
Step 5: Adding Payment Terms and Finalizing
To finish the invoice, add sections for your payment terms and methods (e.g., “Payment due in 30 days”), any additional notes for the client, and your bank details if required. Once everything is in place, set the print area to ensure the invoice prints correctly on a single page.
Step 6: Adding an Invoice Tracker with VBA
For users comfortable with macros, Visual Basic for Applications (VBA) can transform a simple invoice template into a powerful management tool. One common application is to create a “Record Invoice” button that automatically copies all the data from the current invoice (number, date, amount, client) to a separate “Tracker” sheet.
This is achieved by writing a macro that reads the data from the specified cells and pastes it into the next available row of a table on the “Tracker” sheet. A corresponding “Reset Invoice” macro can be written to clear the old data and increment the invoice number for the next invoice, making the workflow seamless and reducing the risk of administrative errors.
Types of Excel Invoice Creator Tools
While simple templates are the most common, the “Excel Invoice Creator” category includes several types of tools, each with its own features.
Standalone Excel Templates
This is the most basic option. It consists of a single Excel file (.xlsx or .xlsm for macros) that acts as a self-contained invoicing solution. The user opens the file, fills out the invoice details, and saves or exports a copy. Many of these are available as free downloads from Microsoft or third-party websites. These templates are simple and effective for managing a low volume of invoices, with no ongoing costs.
Excel Add-ins and Applications
Some vendors offer more sophisticated Excel-based invoicing tools that function as add-ins or full applications within Excel. These tools typically combine the familiar Excel interface with a more robust backend database to store and manage persistent data like customers, products, invoices, and payments. This combination leverages the best of both worlds: using an Excel template for easy and customizable invoice creation while using a database for more reliable data storage and retrieval. This can be a good middle-ground solution for businesses managing a larger volume of invoices and requiring better data organization.
Mobile Excel Invoice Creators
Modern businesses often require the flexibility to create invoices on the go. Several mobile apps are designed specifically for this purpose, using Excel as the core engine. These apps allow users to create professional invoices directly from their phones or tablets, with the ability to export the final document to MS Excel or PDF. This is particularly useful for field workers, contractors, and freelancers who need to bill clients immediately after completing a job.
Common Drawbacks of Excel Invoice Tools
While Excel-based invoicing is highly effective and popular, it also comes with certain limitations that users should be aware of. The primary drawback is the manual nature of data entry, which is prone to errors even with the help of modern AI assistance. Incorrectly entered numbers, client names, or product descriptions can lead to billing disputes and payment delays.
Another significant limitation is the difficulty in integrating Excel invoices with other business systems. While some tools offer ways to customize integration, it generally does not connect out-of-the-box with advanced accounting or Customer Relationship Management (CRM) platforms. This can lead to data silos and require manual double-entry of data into other systems like QuickBooks or Xero.
Scalability is also an issue. Excel-based systems are not designed for high-volume invoicing. For businesses that send thousands of invoices a month, an Excel solution can become slow, difficult to manage, and more error-prone than a dedicated invoicing or ERP system. The reliance on Microsoft Excel also means that a user with strong Excel skills may be needed to create and maintain the invoice templates and macros.
Frequently Asked Questions (FAQs)
1. Is there a free invoice template in Excel?
Yes. Microsoft Excel includes several free invoice templates that can be accessed directly from the application’s startup screen or the “New” tab by searching for “invoice”. These templates are fully customizable with your business information and logo.
2. Can I create an invoice in Excel and then send it as a PDF?
Absolutely. A standard practice is to create the invoice in Excel and then save it as a PDF to send to clients. Saving it as a PDF ensures that the client receives an uneditable, clear document that maintains its formatting regardless of their software or device, preventing any accidental changes during viewing.
3. Does an Excel invoice template automatically calculate totals?
Yes, most professional Excel invoice templates have built-in formulas that automatically calculate line item totals, subtotals, tax, and the final amount due. When you update the quantity or price of an item, the related totals are updated automatically, which eliminates math errors and saves time.
4. Can Excel generate multiple invoices from a list of data at once?
Yes, but this typically requires a more advanced solution than a standard template. Some dedicated Excel-based invoicing applications and add-ins can read invoice data from a table (e.g., in CSV or Excel format) and generate individual PDF invoices for each row. This is a feature often used in batch invoicing scenarios.
5. What are the main disadvantages of using Excel for invoicing?
The main disadvantages include the manual nature of data entry, which is prone to errors; limited integration with other business systems like accounting software or CRMs; and potential scalability issues as invoice volume grows. Additionally, data security and compliance may be more challenging to manage compared to specialized invoicing software.
Conclusion
The Excel Invoice Creator, in its many forms, remains a powerful, cost-effective, and highly accessible tool for businesses of all sizes. From the simplicity of Microsoft’s built-in templates to the advanced automation of custom-built solutions with VBA, Excel offers a flexible platform for creating professional, accurate invoices.
For small businesses and freelancers, the benefits are clear: zero or low cost, extreme customization, automatic calculations, and the comfort of a familiar interface. The ability to create a template that perfectly reflects a brand’s identity and fully automates the billing process is a significant advantage. For growing businesses, the option to transition to more sophisticated Excel add-ins that offer backend database capabilities provides a scalable bridge before moving to dedicated accounting software.
While Excel does have limitations—particularly in integration and high-volume scalability—it addresses the core needs of most small to medium-sized invoicing tasks effectively. The key is to identify the method that best fits your business: using a quick template, building a custom solution from scratch, or adopting a more advanced Excel-based application. By leveraging the power of Excel, you can turn a mundane administrative task into a streamlined, professional operation that supports healthy cash flow and a strong client relationship.